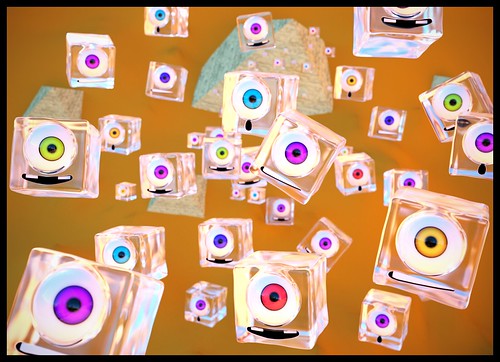
I want to show you a quick render I made, inspired by an illustration of Emanuele Tenderini
http://emanueletenderini.blogspot.com/2011/01/dei-2.html
When I saw these cuboid things, I absolutely had to do it
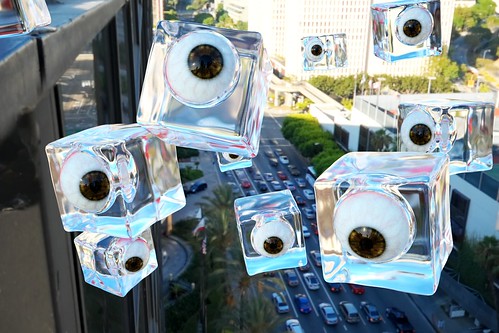
At first I tried to make something more realistic, but the result was a bit too
creepy:
▲
http://emanueletenderini.blogspot.com/2011/01/dei-2.html
When I saw these cuboid things, I absolutely had to do it

At first I tried to make something more realistic, but the result was a bit too
creepy:

▲
Finally, the final rendering.
I added some post processing effects using blender nodes, such as glare, vignetting, color belance, etc..
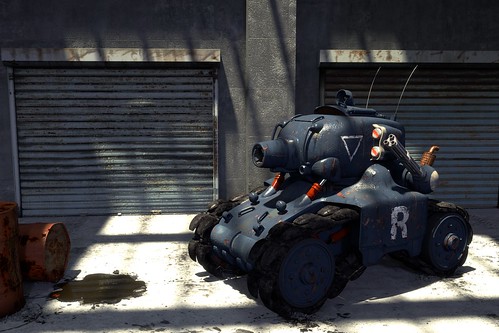
Here you can find the work in progress: W.I.P. link
▲
I added some post processing effects using blender nodes, such as glare, vignetting, color belance, etc..

Here you can find the work in progress: W.I.P. link
▲
Weathering tutorial using textures and project paint
Posted on 06:12, under texture, Tutorial, weathering
This is the first tutorial I write so I hope to be clear.
I wanted to show you how to add some textures to a material to reach the effect called whethering.
For this example I'll use a simple sphere with a hole, inside which there is a small screw.
Here you can see the wire and a render test for uv mapping (uv mapping is essential for texturing).
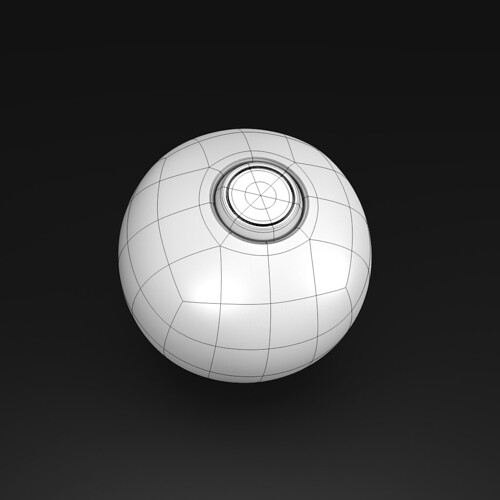
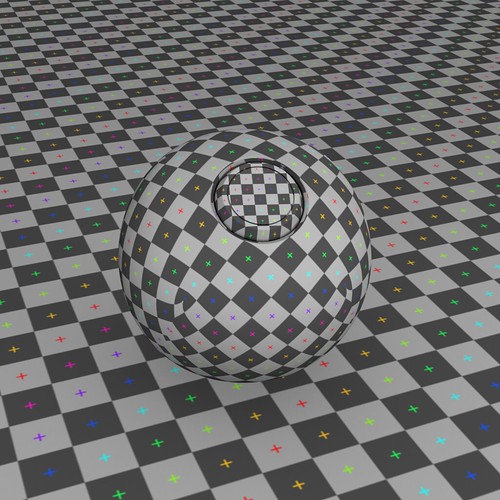
This is the texture order for the shpere:

and for the detail:

First af all you need to set a basic material:

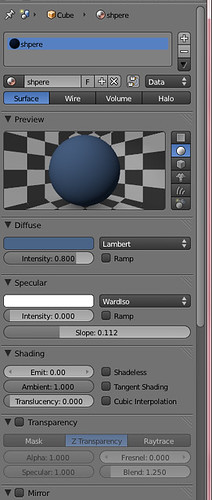
I set to 0 the specular intensity value because we will use a texture to control it.
Let's apply the first set of textures (diffuse and specular), using the same image.
In this case I used "RustPaint0304_L" from cg textures.
Use this parameters for diffuse:

and specular:
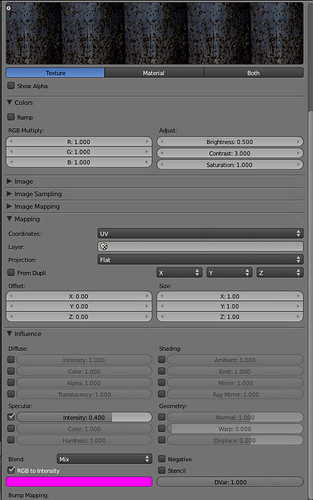
Reaching this result:
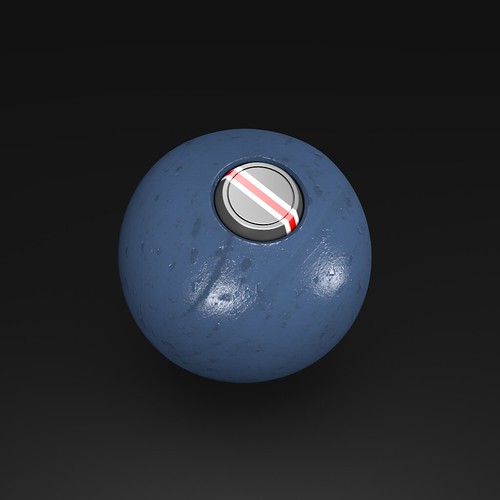
After this step you'll have a nice bump texture, and a slight change in color, but the rust will not be satisfactory at all.
To enhance the rust I used a stencil map + a plain rust image; the stencil was created in photoshop from the image used in the previous step modifying the levels, getting a picture with a markedly contrasts:
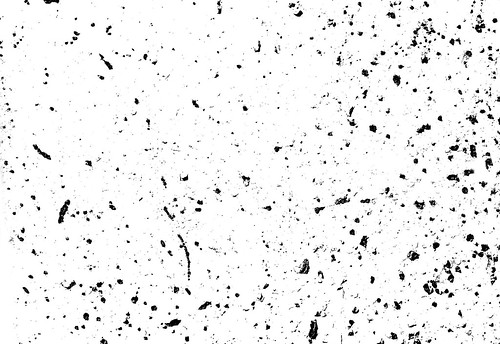
Now apply this image as a stencil using the following parameters:
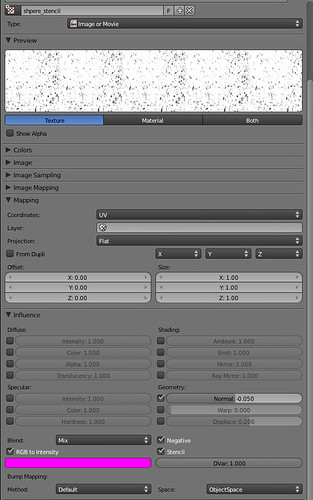
below the level of the stencil I put a picture of generic rust (in this case Rust0185_1)
After rendering, you'll get this result:
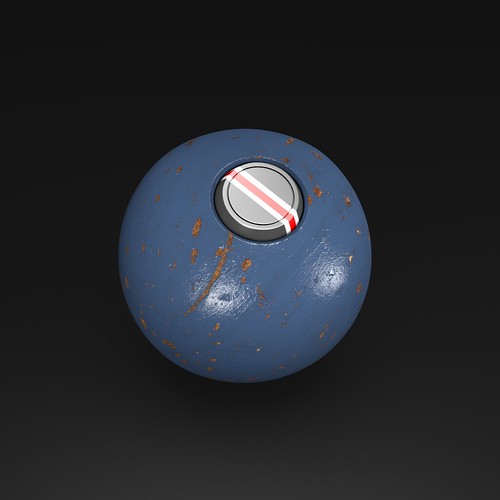
Now we begin to use the project painting for the discoloration:
we start creating an image 2046x2048 with a level of alpha = 0
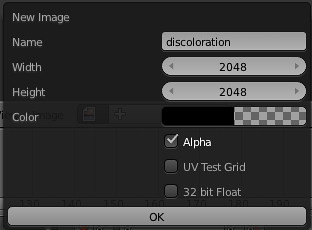
then enter into texture paint mode and begin to color our ball using a very big brush with a low straight, using colors like dark brown, yellow and green, to simulate the yellowing of the paint, dripping, and other signs of aging.
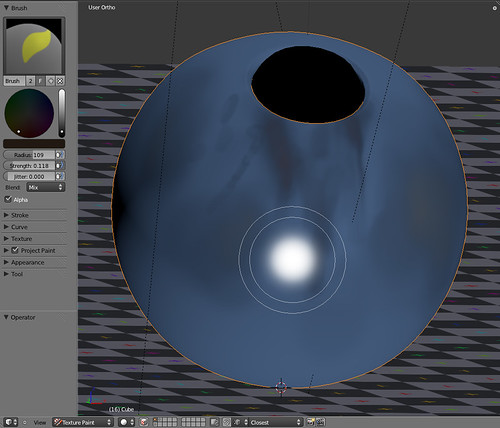
Save the texture, check "premultiply" and add it in the textures of the material; finally launch a render:
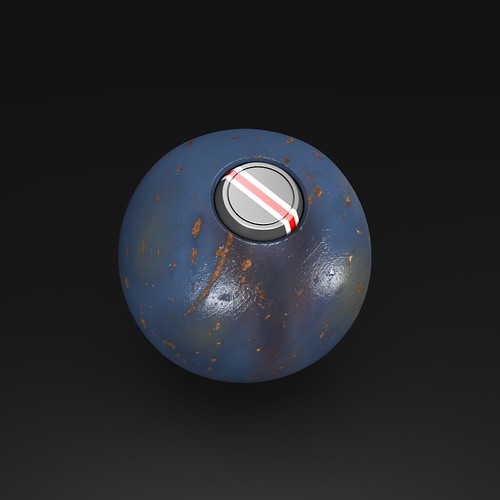
Create another texture with the same parameters of the previous image; in this one draw the details that will be more visible, using the again the project painting.
At first draw some dots where we want to make the dripping effect and then use the smear tool for stretching the dot down and obtain the desired result.
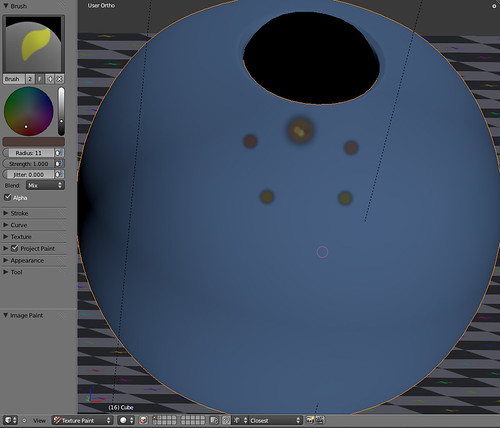
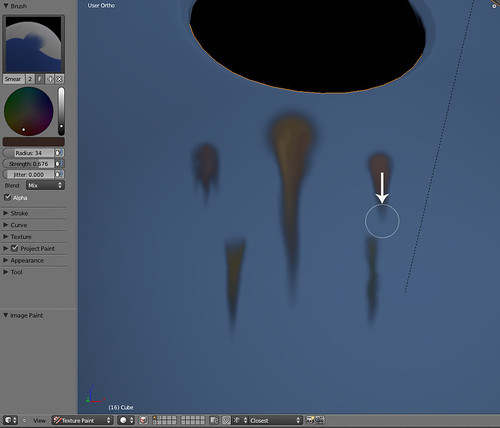
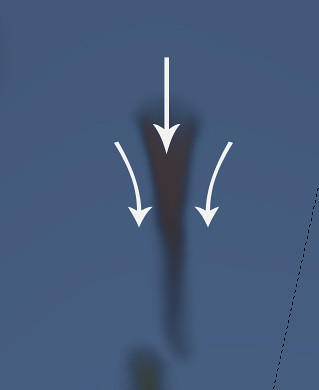
Wider will be our color palette, more the result will be satisfactory; we can add more colors in the same spot, which will must be mixed together using again the smear tool.
This technique is the same used for weathering a models kit, using procedures like these: http://www.mainlymedieval.com/ozpainters/viewtopic.php?t=827
Here it's the final result on the sphere with all the texture applied:
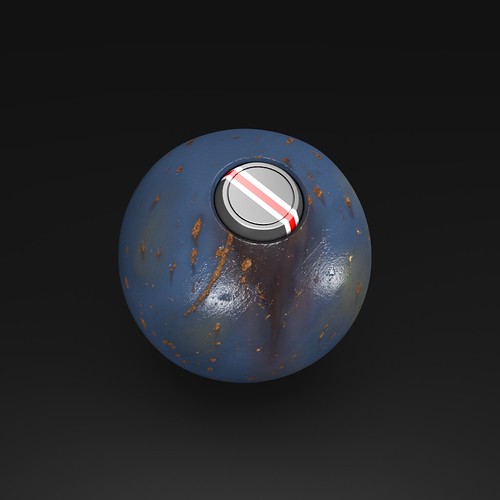
Be patient during this stage: the more detail you will draw, the more realistic result you'll get.
Now do the same on the detail.
Diffuse + specular texture:
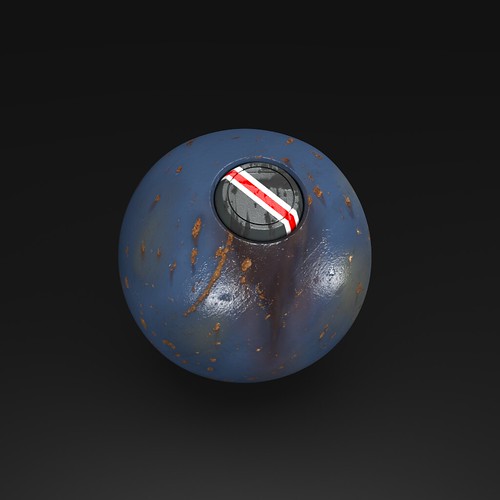
Stencil + rust texture:

And the final result (for the decal, I used photoshop for the chipping paint effect):

And here is the .blend file of my work.
I hope I was clear; if you don't understand some step, if you have any suggestions or tips, let me know (especially corrections of my poor English).
▲
I wanted to show you how to add some textures to a material to reach the effect called whethering.
For this example I'll use a simple sphere with a hole, inside which there is a small screw.
Here you can see the wire and a render test for uv mapping (uv mapping is essential for texturing).


This is the texture order for the shpere:

and for the detail:

First af all you need to set a basic material:


I set to 0 the specular intensity value because we will use a texture to control it.
Let's apply the first set of textures (diffuse and specular), using the same image.
In this case I used "RustPaint0304_L" from cg textures.
Use this parameters for diffuse:

and specular:

Reaching this result:

After this step you'll have a nice bump texture, and a slight change in color, but the rust will not be satisfactory at all.
To enhance the rust I used a stencil map + a plain rust image; the stencil was created in photoshop from the image used in the previous step modifying the levels, getting a picture with a markedly contrasts:

Now apply this image as a stencil using the following parameters:

below the level of the stencil I put a picture of generic rust (in this case Rust0185_1)
After rendering, you'll get this result:

Now we begin to use the project painting for the discoloration:
we start creating an image 2046x2048 with a level of alpha = 0

then enter into texture paint mode and begin to color our ball using a very big brush with a low straight, using colors like dark brown, yellow and green, to simulate the yellowing of the paint, dripping, and other signs of aging.

Save the texture, check "premultiply" and add it in the textures of the material; finally launch a render:

Create another texture with the same parameters of the previous image; in this one draw the details that will be more visible, using the again the project painting.
At first draw some dots where we want to make the dripping effect and then use the smear tool for stretching the dot down and obtain the desired result.


Wider will be our color palette, more the result will be satisfactory; we can add more colors in the same spot, which will must be mixed together using again the smear tool.
This technique is the same used for weathering a models kit, using procedures like these: http://www.mainlymedieval.com/ozpainters/viewtopic.php?t=827
Here it's the final result on the sphere with all the texture applied:

Be patient during this stage: the more detail you will draw, the more realistic result you'll get.
Now do the same on the detail.
Diffuse + specular texture:

Stencil + rust texture:

And the final result (for the decal, I used photoshop for the chipping paint effect):

And here is the .blend file of my work.
I hope I was clear; if you don't understand some step, if you have any suggestions or tips, let me know (especially corrections of my poor English).
▲

